I've created a couple of YouTube demo videos for side-projects up to now. Since it's so long between these video creation sessions, each time I need to dust off my memories to try and remember exactly how I did it previously.
The initial videos were very exploratory, but I think I've found a workflow that works for me. This post will document the method I used, hopefully it's useful to you too.
Here's an example of such a voiceover I made: YouTube video
Planning
First create the script, make sure that the storyline makes sense on a high-level. Make sure you cover all the important parts of your product a new user needs to know about. Have a proper intro, set expectations for the video, have core content, and outro. Ensure you actually deliver on the expectations set. Make sure each sentence is clear and concise, and not unnecessarily complicated. Text-to-Speech (TTS) generation works better with shorter sentences.
Visuals
I usually just do a screenrecording that walks through the script steps to showcase the product. Do not worry too much about timing, you can cut & change speed of the segments during editing to align it with the final audio.
It's also useful to have some static image content like screenshots / slides that can also be used for the video thumbnail, intros or outros.
Audio - generating the AI audio clips
You can clone an existing voice, or use a ready made voice model to generate these audio clips.
-
To clone: The easiest is to use a media stream downloading tool like Bulk Media Downloader to grab some audio from the internet.
- To convert the downloaded mp3 into a usable wav file:
ffmpeg -i input.mp3 output.wav
- To convert the downloaded mp3 into a usable wav file:
-
Ready made Voice Model: thorsten-voice.de
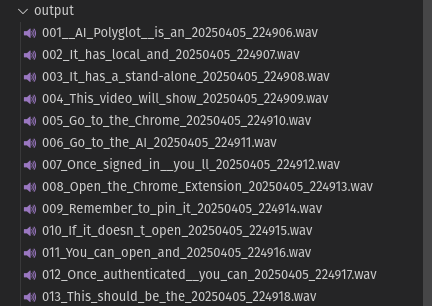
I use this little python script to generate multiple audio clips for each sentence in the demo video script. You might need to modify it slightly to suit your needs. It uses Coqui's TTS library to generate the audio locally. No need to use any online services.
I used python 3.10.14, install the dependencies by running:
pip install torch==2.4.1 tts nltk
Usage example:
python generate-audio.py --script AIPolyglot_Script2.txt --voice voice.wav
This will result in a output folder that looks like this:
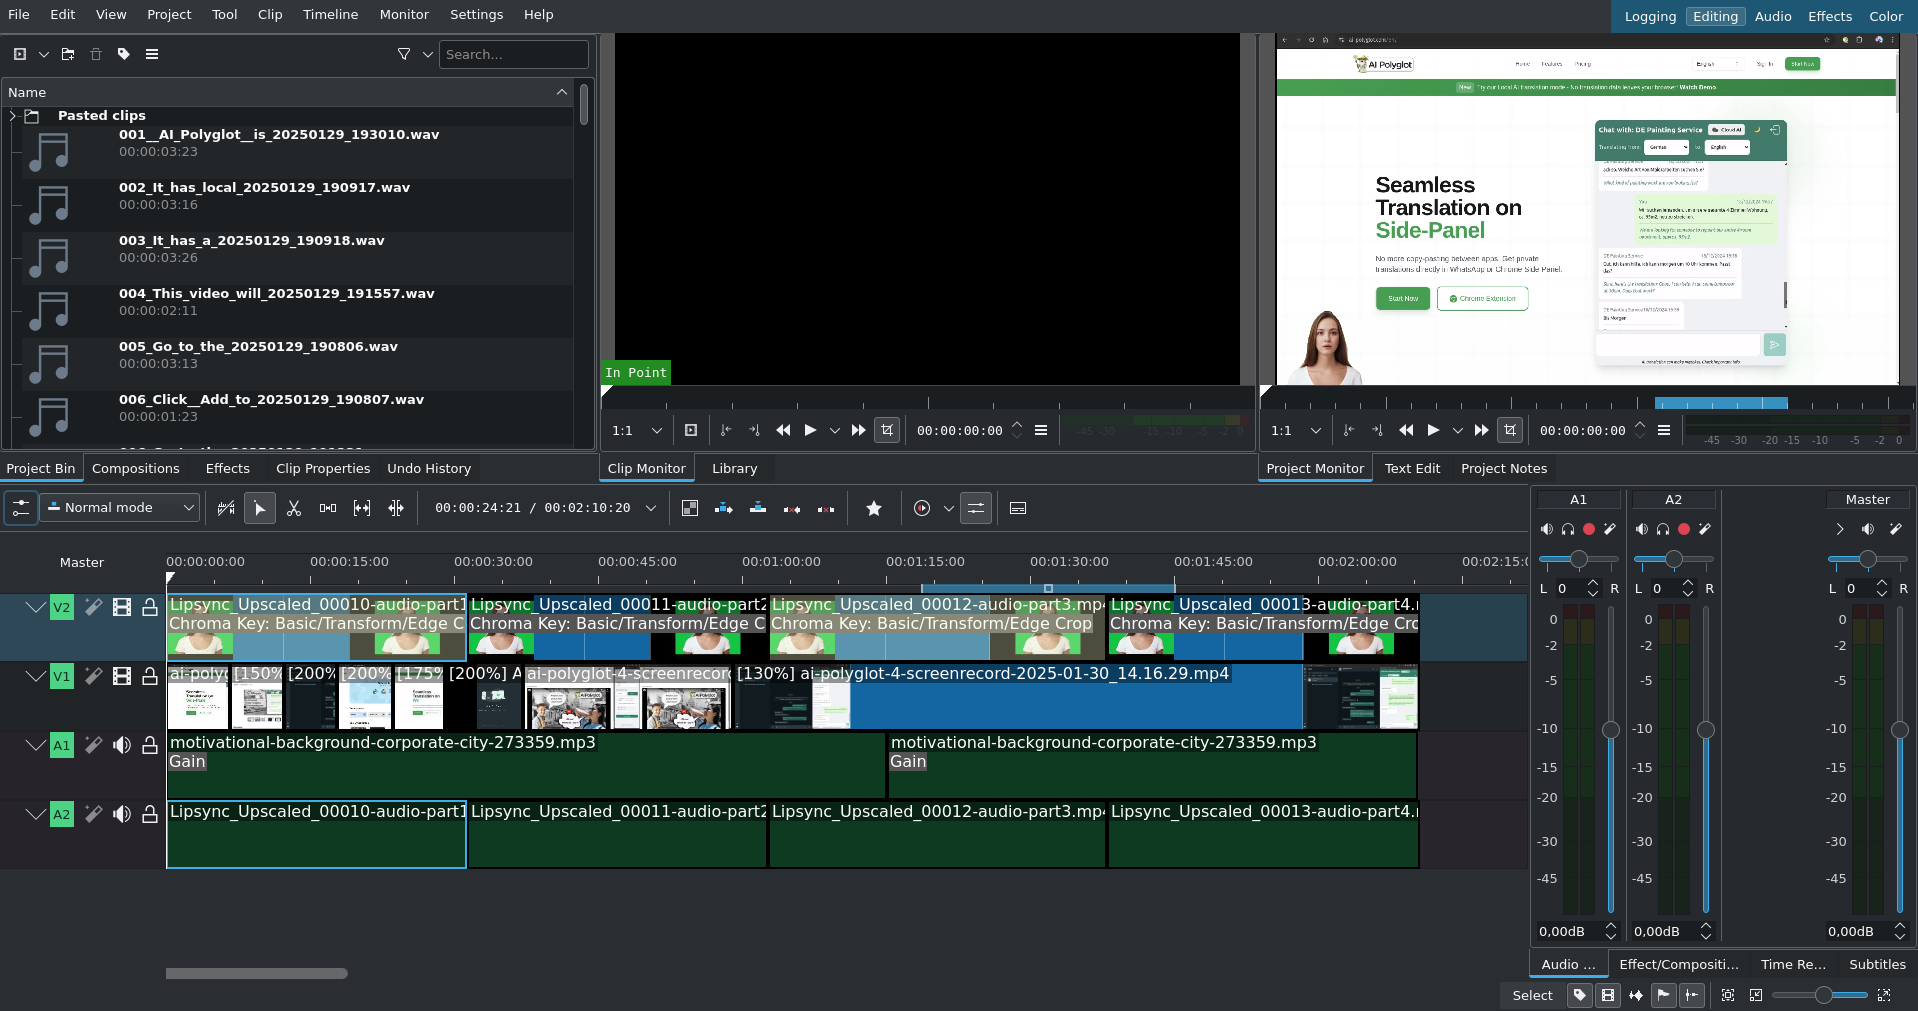
Editing
Kdenlive is a great open source cross-platform video editing project. Add the visuals to the project. The main tools I use are the "cutting" + "move" tools, and changing the speed of a segment (right-click -> change speed)
Adding the audio
Since you have a couple of versions per sentence, listen to these after eachother and choose the best one that "flows" nicely from the previous sentence and into the next sentence. This is quite a tedious exercise, but results in a much nicer end product. Drag the chosen ones into your Kdenlive project.
Now space them out on the audio track so that it sounds natural. This will form the baseline of your video.
Adding the video
Now you cut your video sections, change the clip speeds as needed to align them with your AI voiceover.
Blurring
You inevitably screencapture something in your recording that's better to not share on the video. When this happens Kdenlive makes it easy to blur sections. Each time I need to do this, I have to rewatch some YouTube tutorial, so here's the TLDR to apply blur to a video track on Kdenlive. Switch to the "Editing" layout & select the relevant video clip. (I am using Version 21.12.3 at time of writing this)
Method 1: (For static areas)
- Obscure
Method 2: (Using shapes defined at specific key frames, you can blur dynamic content)
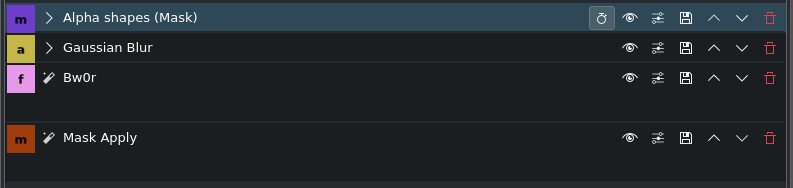
- Alpha shapes (Mask)
- Gaussian Blur
- Bw0r (optional to turn the section black & white)
- Mask Apply
You cannot edit your YouTube video after upload, so ask for a couple of reviews from friends before your upload and share the link.
Keywords
#TTS #Coqui #YouTube #DemoVideo #VoiceOver #Kdenlive #Blur